In the last week I've been working on some sewing; just a change from knitting and crocheting projects. A day or so after the project was finished, a friend sent me this very appropriate meme...a good reminder how stitching can be very therapeutic.

Next week is our granddaughter's first birthday and I had decided to make her some birthday bunting that could be reused year after year. I had made similar bunting for my niece's daughter 6 years ago and it has been useful.

For that bunting I used letters from a Creative Memories stencil, but this time I chose some rather funky lettering from the site Shiny, Happy World. I found this site by googling Fabric Alphabets and it's a very useful site for tutorials and lots of free sewing projects.
So here is the finished bunting, all 19 letters of it.

I ended up hand stitching the letters and found it to be a relaxing task. I couldn't face machining all those curves! Lol.
To finish off the bunting I sewed novelty buttons on some of the flags. Here's a collage of 3 of the letters that I decorated with a novelty button.

DsD2 loved it when we handed it over last Thursday. She said they had been planning to make bunting out of cardboard...being a non sewer, she was impressed that I'd actually made it myself!!! ( few brownie points there I think! Lol)
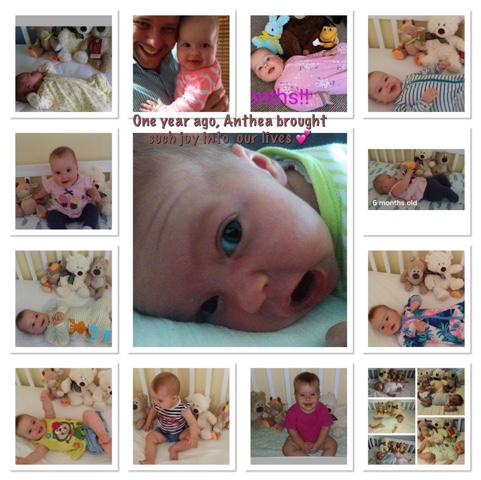
Next week is our granddaughter's first birthday and I had decided to make her some birthday bunting that could be reused year after year. I had made similar bunting for my niece's daughter 6 years ago and it has been useful.
For that bunting I used letters from a Creative Memories stencil, but this time I chose some rather funky lettering from the site Shiny, Happy World. I found this site by googling Fabric Alphabets and it's a very useful site for tutorials and lots of free sewing projects.
So here is the finished bunting, all 19 letters of it.
I ended up hand stitching the letters and found it to be a relaxing task. I couldn't face machining all those curves! Lol.
To finish off the bunting I sewed novelty buttons on some of the flags. Here's a collage of 3 of the letters that I decorated with a novelty button.
DsD2 loved it when we handed it over last Thursday. She said they had been planning to make bunting out of cardboard...being a non sewer, she was impressed that I'd actually made it myself!!! ( few brownie points there I think! Lol)


